

window에서 WSL 파일시스템에 접근하려면 탐색기에서 \\wsl$ 를 입력한다.
'WSL' 카테고리의 다른 글
| VS Code 아키텍처 - 수정 (0) | 2022.01.02 |
|---|---|
| Windows WSL2 아키텍처 (0) | 2022.01.02 |
| Remote - WSL (0) | 2022.01.02 |
| Remote development in WSL (0) | 2022.01.02 |
| WSL에 go 설치하기 (0) | 2022.01.02 |
window에서 WSL 파일시스템에 접근하려면 탐색기에서 \\wsl$ 를 입력한다.
| VS Code 아키텍처 - 수정 (0) | 2022.01.02 |
|---|---|
| Windows WSL2 아키텍처 (0) | 2022.01.02 |
| Remote - WSL (0) | 2022.01.02 |
| Remote development in WSL (0) | 2022.01.02 |
| WSL에 go 설치하기 (0) | 2022.01.02 |
Visual Studio Code Remote - WSL extension을 사용하면 Linux용 Windows 하위 시스템(WSL)을 VS Code에서 바로 풀타임 개발 환경으로 사용할 수 있습니다. Linux 기반 환경에서 개발하고, Linux 전용 도구 체인 및 유틸리티를 사용하고, Windows에서 편안하게 Linux 기반 애플리케이션을 실행 및 디버그할 수 있습니다.
확장은 WSL에서 직접 명령 및 기타 확장을 실행하므로 경로 문제, 바이너리 호환성 또는 기타 교차 OS 문제에 대해 걱정하지 않고 WSL 또는 탑재된 Windows 파일 시스템(예: /mnt/c)에 있는 파일을 편집할 수 있습니다.

이를 통해 VS Code는 코드가 호스팅되는 위치에 관계없이 전체 IntelliSense(완료), 코드 탐색 및 디버깅을 포함한 로컬 개발 환경을 제공할 수 있습니다.
Note: After reviewing this topic, you can get started with the introductory WSL tutorial.
To get started, you need to:
Opening a folder inside the Windows Subsystem for Linux in VS Code is very similar to opening up a Windows folder from the command prompt or PowerShell.


That's it! Any VS Code operations you perform in this window will be executed in the WSL environment, everything from editing and file operations, to debugging, using terminals, and more.
Alternatively, you can open a Remote WSL window directly from VS Code:
If you already have a folder open, you can also use the Remote-WSL: Reopen in WSL command. You will be prompted which distro to use.
If you are in a WSL window and want to open the current input in a local window, use Remote-WSL: Reopen in Windows.
To open a WSL window directly from a Windows prompt use the --remote command line parameter:
code --remote wsl+<distro name> <path in WSL>
for example: code --remote wsl+Ubuntu /home/jim/projects/c
We need to do some guessing on whether the input path is a file or a folder. If it has a file extension, it is considered a file.
To force that a folder is opened, add slash to the path or use:
code --folder-uri vscode-remote://wsl+Ubuntu/home/ubuntu/folder.with.dot
To force that a file is opened add --goto or use:
code --file-uri vscode-remote://wsl+Ubuntu/home/ubuntu/fileWithoutExtension
If you are working with the same repository in WSL and Windows, be sure to set up consistent line endings. See tips and tricks for details.
You can also avoid passwords by configuring WSL to use the Windows Git credential manager. See tips and tricks for details.
VS Code runs extensions in one of two places: locally on the UI / client side, or in WSL. While extensions that affect the VS Code UI, like themes and snippets, are installed locally, most extensions will reside inside WSL.
If you install an extension from the Extensions view, it will automatically be installed in the correct location. Once installed, you can tell where an extension is installed based on the category grouping. There will be Local - Installed category and one for WSL.


Note: If you are an extension author and your extension is not working properly or installs in the wrong place, see Supporting Remote Development for details.
Local extensions that actually need to run remotely will appear dimmed and disabled in the Local - Installed category. Select Install to install an extension on your remote host.

You can also install all locally installed extensions inside WSL by going to the Extensions view and selecting Install Local Extensions in WSL: [Name] using the cloud button at the right of the Local - Installed title bar. This will display a dropdown where you can select which locally installed extensions to install in your WSL instance.

Opening a terminal in WSL from VS Code is simple. Once folder is opened in WSL, any terminal window you open in VS Code (Terminal > New Terminal) will automatically run in WSL rather than locally.
You can also use the code command line from this same terminal window to perform a number of operations such as opening a new file or folder in WSL. Type code --help to see what options are available from the command line.

Once you've opened a folder in WSL, you can use VS Code's debugger in the same way you would when running the application locally. For example, if you select a launch configuration in launch.json and start debugging (F5), the application will start on remote host and attach the debugger to it.
See the debugging documentation for details on configuring VS Code's debugging features in .vscode/launch.json.
VS Code's local user settings are also reused when you have opened a folder in WSL. While this keeps your user experience consistent, you may want to vary some of these settings between your local machine and WSL. Fortunately, once you have connected to WSL, you can also set WSL specific settings by running the Preferences: Open Remote Settings command from the Command Palette (F1) or by selecting the Remote tab in the Settings editor. These will override any local settings you have in place whenever you open a folder in WSL.
When VS Code Remote is started in WSL, no shell startup scripts are run. This was done to avoid issues with startup scripts that are tuned for shells. If you want to run additional commands or modify the environment this can be done in a setup script ~/.vscode-server/server-env-setup (Insiders: ~/.vscode-server-insiders/server-env-setup). If present, the script is processed before the server is started.
The script needs to be a valid Bourne shell script. Be aware that an invalid script will prevent the server from starting up. If you end up with a script that prevents the server from starting, you will have to use a regular WSL shell and delete or rename the setup script.
Check the WSL log (Remote WSL: Open WSL Log) for output and errors.
If you are using WSL 2 and Docker Desktop's WSL 2 back-end, you can use the Remote - Containers extension to work with source code stored inside WSL! Just follow these steps:


See the Remote - Containers documentation for more information.
This section contains a list of common know issues with WSL. The intent is not to provide a complete list of issues but to highlight some of the common problems seen with WSL.
See here for a list of active issues related to WSL.
That's a known problem with the WSL file system implementation (Microsoft/WSL#3395, Microsoft/WSL#1956) caused by the file watcher active by VSCode. The issue will only be fixed in WSL 2.
To avoid the issue, set remote.WSL.fileWatcher.polling to true. However, polling based file watching has a performance impact for large workspaces.
For large workspace you want to increase the polling interval: remote.WSL.fileWatcher.pollingInterval and control the folders that are watched: files.watcherExclude.
WSL 2 does not have that file watcher problem is also not affected by the new setting.
IssueExisting issues
| Delve debugger doesn't work under WSL | go-delve/delve#810, Microsoft/vscode-go#926 |
IssueExisting issues
| NodeJS Error: spawn EACCES (different variants of this error) | Microsoft/WSL#3886 |
| Webpack HMR not working | Microsoft/WSL#2709 |
| Firebase via node unusably slow only on WSL | Microsoft/WSL#2657 |
If you clone a Git repository using SSH and your SSH key has a passphrase, VS Code's pull and sync features may hang when running remotely. Either use an SSH key without a passphrase, clone using HTTPS, or run git push from the command line to work around the issue.
While the Docker extension can run both remotely and locally, if it is already installed locally, you will be unable to install on a remote SSH host without first uninstalling it locally. We will address this problem in a future VS Code release.
Many extensions will work in WSL without modification. However, in some cases, certain features may require changes. If you run into an extension issue, see here for a summary of common problems and solutions that you can mention to the extension author when reporting the issue.
In addition, some extensions installed in an WSL when using an Alpine Linux-based distribution may not work due to glibc dependencies in native code inside the extension. See the Remote Development with Linux article for details.
When using Remote-WSL: New Window using Distro and running on WSL older than Windows 10, May 2019 Update (version 1903) you will be asked to switch the default distribution as the WSL command can only work on the default distro as it does not support the -d option yet.
You can always manually switch the default distro by using wslconfig.exe.
For example:
wslconfig /setdefault UbuntuYou can see which distributions you have installed using:
wslconfig /lSome extensions rely on libraries not found in the vanilla install of certain WSL Linux distributions. You can add additional libraries into your Linux distribution by using its package manager. For Ubuntu and Debian based distributions, run sudo apt-get install <package> to install the needed libraries. Check the documentation for your extension or the runtime that is mentioned for additional installation details.
The Remote - WSL extension and VS Code Server require outbound HTTPS (port 443) connectivity to:
Some extensions (like C#) download secondary dependencies from download.microsoft.com or download.visualstudio.microsoft.com. Others (like Visual Studio Live Share) may have additional connectivity requirements. Consult the extension's documentation for details if you run into trouble.
All other communication between the server and the VS Code client is accomplished through an random local TCP port. You can find a list of locations VS Code itself needs access to in the network connections article.
Proxy settings might be missing on either the Windows or the WSL side.
When a remote window is opened out of VSCode, the Remote - WSL extension tries to download the VSCode server on the Windows side. It therefore uses the Window side proxy configuration:
When the remote VSCode is started from a WSL terminal, the download is done using wget in the WSL distro. Proxy settings can be configured in:
Once the server is up and running the proxy settings on the Remote tab are used.
Extensions are typically designed and tested to either run locally or remotely, not both. However, if an extension supports it, you can force it to run in a particular location in your settings.json file.
For example, the setting below will force the Docker extension to run locally and Debugger for Chrome extension to run remotely instead of their defaults:
"remote.extensionKind": {
    "ms-azuretools.vscode-docker": [ "ui" ],
    "msjsdiag.debugger-for-chrome": [ "workspace" ]
}
A value of "ui" instead of "workspace" will force the extension to run on the local UI/client side instead. Typically, this should only be used for testing unless otherwise noted in the extension's documentation since it can break extensions. See the article on Supporting Remote Development for details.
The VS Code extension API abstracts away local/remote details so most extensions will work without modification. However, given extensions can use any node module or runtime they want, there are situations where adjustments may need to be made. We recommend you test your extension to be sure that no updates are required. See Supporting Remote Development for details
| WSL2 네트워크 구조 (0) | 2022.01.09 |
|---|---|
| Windows WSL2 아키텍처 (0) | 2022.01.02 |
| Remote - WSL (0) | 2022.01.02 |
| Remote development in WSL (0) | 2022.01.02 |
| WSL에 go 설치하기 (0) | 2022.01.02 |

| WSL2 네트워크 구조 (0) | 2022.01.09 |
|---|---|
| VS Code 아키텍처 - 수정 (0) | 2022.01.02 |
| Remote - WSL (0) | 2022.01.02 |
| Remote development in WSL (0) | 2022.01.02 |
| WSL에 go 설치하기 (0) | 2022.01.02 |
원격 - WSL 확장(Remote - WSL extension)을 사용하면 Windows에서 VS Code를 사용하여 Linux용 Windows 하위 시스템(WSL)에서 실행되는 Linux 애플리케이션을 빌드할 수 있습니다. Linux 기반 도구, 런타임 및 유틸리티를 사용하여 개발하면서 Windows의 모든 생산성을 얻을 수 있습니다.
원격 - WSL을 사용하면 Windows에서와 마찬가지로 WSL에서 VS Code를 사용할 수 있습니다.
WSL을 사용하면 기존 가상 머신이나 이중 부팅 설정의 오버헤드 없이 Windows에서 직접 명령줄 도구 및 응용 프로그램을 포함한 Linux 환경을 실행할 수 있습니다.
WSL은 특히 웹 개발자와 Bash 및 Linux 도구(예: Ruby, Python)로 작업하는 사람들이 Windows에서도 같은 도구를 사용하여 개발 환경과 프로덕션 환경 간의 일관성을 보장하는 데 도움이 됩니다.
Windows에 Linux 버전을 설치하면 완전한 Linux 환경이 제공됩니다. Windows와 격리되어 있습니다. UI는 터미널이며 Windows를 수정하거나 중단하지 않고 Linux 환경에 도구, 개발언어 및 컴파일러를 설치할 수 있습니다.
WSL 1에 비해 상당한 성능 이점을 얻을 수 있으므로 WSL 2를 사용하는 것이 좋습니다.
Windows 기반 도구를 사용하여 Linux 파일을 편집할 수는 있지만 Windows에서 쉽게 실행하거나 디버그할 수 없습니다. Linux에서와 동일한 도구를 Windows에 모두 설치해야 하므로 격리된 Linux 환경을 사용하려는 목적이 무의미해집니다. . \\wsl$\ 공유에서 파일을 볼 수 있지만 자동 완성, 디버깅 또는 린팅과 같은 기능에는 액세스할 수 없습니다.

VS Code와 Remote - WSL 확장을 결합하면 VS Code의 UI는 Windows에서 실행되고 명령, 확장, 터미널까지 Linux에서 실행됩니다. Linux에 설치된 도구와 컴파일러로 자동 완성 및 디버깅을 포함한 VS Code 를 사용할 수 있습니다.
WSL 터미널을 열고 선택한 폴더(개발 소스가 있는 폴더)로 이동한 다음 code .를 입력합니다. 아래와 같이 VS Code Server 설치된 후 WSL에 연결된 VS Code를 시작됩니다. 여기에서 code 뒤의 . (점) 은 경로를 나타냅니다. 특정 경로를 지정하려면 code /python_project 등과 같이 지정하면 그 디렉토리를 기준으로 VSCode가 실행됩니다.
아래 예제는 /mt/d/python 으로 설정되어 있는데 아무 위치에서나 code /mnt/d/phthon 이렇게 하셔도 됩니다.
username@DESKTOP-3QERQ93:/mnt/d/python$ code .

Installing VS Code Server for x64 (899d46d82c4c95423fb7e10e68eba52050e30ba3)
Downloading: 100%
Unpacking: 100%
Unpacked 1722 files and folders to /home/username/.vscode-server/bin/8eba52050e30ba3.
실행된 VS Code의 좌측 하단을 보면 "Running in Ubuntu(WSL 2)"를 보실 수 있습니다.

Remote – WSL을 사용하여 앱을 시작하려면 단계별 WSL 자습서(Remote - WSL Getting Started Tutorial)를 참고하세요.
Remote-WSL extension은 VS Code에 몇 개의 명령어을 추가합니다. F1을 눌러 명령 팔레트를 열고 Remote-WSL을 입력하거나 상태 표시줄의 왼쪽 하단 모서리에 있는 녹색 원격 표시기를 선택하여 불러올 수 있습니다.
Remote-WSL: New Window를 선택하면
기본 WSL 배포판에 연결된 새 VS 코드 창이 열립니다.

녹색 원격 표시기가 현재 연결되어 있는 WSL 배포판(이 경우 Ubuntu)으로 변경됩니다. 폴더 열기 버튼을 선택하여 원격 Linux 배포판의 파일 시스템 내용을 볼 수 있습니다.
폴더를 선택하면 VS Code가 환경을 설정하고 해당 WSL 폴더의 내용이 포함된 새 VS Code 창이 나타납니다.
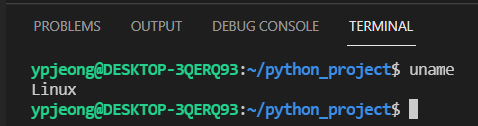
터미널을 열려면 Ctrl+` 키보드 단축키를 사용하거나 메뉴의 [Terminal] - [New Terminal]을 클릭합니다. "uname"을 실행하면 Linux 시스템에 있음을 나타냅니다.
상태 표시줄의 왼쪽 하단 모서리에 있는 녹색 원격 표시기를 선택하여 불러올 수 있습니다.

Remote-WSL: New Window Using Distro... 를 선택하면
Remote-WSL: New Window와 마찬가지로 이 명령은 WSL에 연결된 새 VS Code 창을 엽니다. 특정 WSL 배포판을 선택할 수 있도록 선택이 열립니다.

Remote-WSL: Reopen Folder in WSL
Windows에 연결된 VS Code 인스턴스에서 현재 열려 있는 WSL의 폴더를 다시 엽니다.
폴더가 WSL 파일 시스템에 있는 경우 폴더 위로 마우스를 가져가면 Linux 경로가 표시됩니다. 폴더가 Windows에 있는 경우 WSL에 의해 자동으로 생성된 탑재 지점(예: /mnt/c/<file_path>)이 표시됩니다.
Note: 성능을 최적화하려면 Windows 파일 시스템(예: C:\Users\<username>\Project)이 아닌 Linux 파일 시스템(예: \\wsl$\Ubuntu-18.04\home\<user name>\Project)에 프로젝트 파일을 저장하세요.)
파일이 Windows에 있는 경우 Linux 파일 시스템에 복사하는 것이 좋습니다.
| VS Code 아키텍처 - 수정 (0) | 2022.01.02 |
|---|---|
| Windows WSL2 아키텍처 (0) | 2022.01.02 |
| Remote development in WSL (0) | 2022.01.02 |
| WSL에 go 설치하기 (0) | 2022.01.02 |
| WSL에서 X로 그래픽 애플리케이션 실행 (0) | 2021.12.30 |
이 문서에서는 WSL(Linux용 Windows 하위 시스템)을 활성화하고
"Remote - WSL extension"을 사용하여 WSL에서 Visual Studio Code를 실행하는 방법을 설명합니다.
Visual Studio Code가 설치되어 있어야 합니다.
"Remote - WSL extension"을 사용하면 Linux Windows 하위시스템(WSL)에서 Visual Studio Code를 실행할 수 있습니다.

Remote - WSL 확장이 설치되면 맨 왼쪽에 새 상태 표시줄 항목이 표시됩니다.

The Remote Status bar item can quickly show you in which context VS Code is running (local or remote) and clicking on the item will bring up the Remote - WSL commands.
원격 상태 표시줄 항목은 VS 코드가 실행 중인 컨텍스트(로컬 또는 원격)를 빠르게 표시할 수 있으며 항목을 클릭하면 원격 - WSL 명령이 표시됩니다.

Windows Subsystem for Linux (WSL) is an optional feature on Windows 10. You can enable it through the Windows Features dialog or PowerShell.
WSL(Linux용 Windows 하위 시스템)은 Windows 10의 선택적 기능입니다. Windows 기능 대화 상자 또는 PowerShell을 통해 활성화할 수 있습니다.
Windows 검색 창에 'features'을 입력하여 Windows 기능 켜기 및 끄기 대화 상자를 불러옵니다.
Linux용 Windows 하위 시스템을 체크합니다.

확인을 선택하면 Windows를 다시 시작하라는 메시지가 표시됩니다.
PowerShell로 설정할 수도 있습니다. PowerShell을 관리자로 열고 다음을 입력하면 됩니다.
Enable-WindowsOptionalFeature -Online -FeatureName Microsoft-Windows-Subsystem-LinuxAfter the command runs, you will be prompted to restart Windows.

After restarting Windows, you can check that you have WSL enabled by opening a Command Prompt and typing 'wsl'.

WSL is enabled, but you haven't installed a Linux distribution yet.
You install Linux distributions for WSL from the Microsoft Store. You can use the store app, or search for a Linux distro in the Windows search bar. Choose the Linux distribution you want to install (for example Ubuntu) and follow the prompts.

Select Install.

And when done, select Launch to get started. This will open a Linux terminal and complete the installation. You'll need to create a user ID and password since you are setting up a full Linux instance. You are now running Linux on Windows.

If you don't have Python already installed, run the following commands to install Python3 and pip, the package manager for Python, into your Linux installation.
sudo apt update
sudo apt install python3 python3-pip
And to verify, run:
python3 --versionStart with the canonical "Hello World" app. Create a new folder called "helloWorld" and then add a Python file that will print a message when run:
mkdir helloWorld && cd helloWorld
echo 'print("hello from python on ubuntu on windows!")' >> hello.py
python3 hello.py
In a remote Linux environment (this WSL distro is technically another machine without UI, that just happens to be running locally on your computer), your development tools and experiences are pretty limited. You can run Vim in the terminal to edit your file, or you can edit the sources on the Windows side through the \\wsl$ mount:

The problem with this model is that the Python runtime, pip, or any conda packages for that matter, are not installed on Windows.

Remember, Python is installed in the Linux distro, which means if you're editing Python files on the Windows side, you can't run or debug them unless you install the same Python development stack on Windows. And that defeats the purpose of having an isolated Linux instance set up with all your Python tools and runtimes!
In the WSL terminal, make sure you are in the helloWorld folder, and type in 'code .' to launch Visual Studio Code. The '.' argument tells VS Code to open the current folder.
Note: If this command does not work, you may need to restart your terminal, or you may not have added VS Code to your path when it was installed.

The first thing you'll see is a message about "Installing VS Code Server" (the c7d83e57… number is the version of the VS Code Server that matches the client-side tools you just installed). VS Code is installing a small server on the Linux side that the desktop VS Code will then talk to. That server will then install and host extensions in WSL, so that they run in the context of the tools and frameworks installed in WSL. In other words, your language extensions will run against the tools and frameworks installed in WSL, not against what is installed on the Windows side, as it should for the proper development experience.
The next thing that happens is VS Code will start and open the helloWorld folder. You may see a quick notification telling you that VS Code is connecting to WSL, and you may be prompted to allow access to the Node.js-based server.

Now, when you hover over hello.py, you get the proper Linux path.

Run Terminal > New Terminal (Ctrl+`) to open a new terminal instance.

You'll start a new instance of the bash shell in WSL, again from VS Code running on Windows.
Tip: In the lower left corner of the Status Bar, you can see that you're connected to your WSL: Ubuntu instance.

Click on hello.py to open it for editing. You will be prompted with an extension recommendation, in this case to install the Microsoft Python extension, which will give you rich editing and debugging experiences. Go ahead and select Install and reload if prompted.

To prove that the extension is installed in WSL, open the Extensions view again (Ctrl+Shift+X). You will see a section titled WSL: Ubuntu – Installed, and you can see any extensions that are installed on the WSL side.

Upon reload, you'll also get prompted telling you that the pylint linter is not installed. Linters are used to show errors and warnings in source code. Go ahead and select Install.

Now, when you edit your code, you get rich colorization and completions.

And when you save your file (Ctrl+S), you'll get linting errors and warnings on the file.

With your tools set up, let's take this one step further. Set a breakpoint on line 1 of hello.py by clicking in the gutter to the left of the line number or by putting the cursor on the line and pressing F9.

Now, press F5 to run your application. You will be asked how to run the application, and since this is a simple file, just choose Python File.

The app will start, and you'll hit the breakpoint. You can inspect variables, create watches, and navigate the call stack.
Press F10 to step and you'll see the output of the print statement in the debug console.

You get the full development experience of Visual Studio Code, using the Linux instance installed in WSL.
If you want to open another folder in WSL, open the File menu and choose Open Folder. You'll get a minimal file and folder navigator for the Linux file system, not the Windows file system.

If you want to switch back to the Windows, select the Show Local option and you'll get the standard Windows File Open dialog.
You can end your session in WSL and go back to running VS Code locally with File > Close Remote Connection.
Congratulations, you've successfully completed this tutorial!
Next, check out the other Remote Development extensions.
Or get them all by installing the Remote Development Extension Pack.
| VS Code 아키텍처 - 수정 (0) | 2022.01.02 |
|---|---|
| Windows WSL2 아키텍처 (0) | 2022.01.02 |
| Remote - WSL (0) | 2022.01.02 |
| WSL에 go 설치하기 (0) | 2022.01.02 |
| WSL에서 X로 그래픽 애플리케이션 실행 (0) | 2021.12.30 |
Window10의 WSL2에 접속합니다. 처음 접속할 경우 WSL 생성 시 입력했던 패스워드를 입력합니다.
go version 을 입력해서 잘 설치되었는지 확인합니다.
$ sudo apt install golang-go
... ...
Setting up golang-race-detector-runtime (2:1.13~1ubuntu2) ...
Setting up golang-go (2:1.13~1ubuntu2) ...
Processing triggers for man-db (2.9.1-1) ...

## 설치완료 후
$ go version
go version go1.13.8 linux/amd64
이후 터미널에서 적당한 위치(작업폴더 등)로 이동해서 code . 을 입력하면 VScode 가 실행됩니다.
VSCode 실행 후 첫 화면 Customize your Setup에서 Code in any language 를 선택하시면
원하는 언어를 선택해서 Extension을 설치 할 수 있습니다. 본 문서는 영문 환경에서 수행했습니다.

VSCode 창의 좌측 "EXPLORER" 화면에서 마우스 오른쪽 클릭 후 "New File" 을 선택합니다.
입력창에 hello.go 를 입력하여 파일을 생성합니다. 코드 입력창에 아래 코드를 입력합니다.
package main

import "fmt"

func main() {
  fmt.Println("Hello, World")
}
F5 또는 Ctrl + F5로 작성한 코드를 실행하면, Go Extensions을 설치하라는 메시지가 뜹니다. "Find Go extension" 버튼을 클릭하면, 좌측화면에 extension 목록이 뜹니다. 우선 GO Extension을 설치합니다.

설치가 완료되면 아래 화면이 나타나는데 "Install All" 버튼을 클릭하여 GO 관련 extension을 모두 설치합니다. 정상적으로 설치가 완료되면 "All tools successfully installed. You are ready to Go. :)" 메시가 출력됩니다.

6. 실행하기
위에서 만들었던 test.go 를 F5로 디버깅 모드로 실행 하면 DEBUG CONSOLE 탭에 아래와 같이 출력됩니다.

| VS Code 아키텍처 - 수정 (0) | 2022.01.02 |
|---|---|
| Windows WSL2 아키텍처 (0) | 2022.01.02 |
| Remote - WSL (0) | 2022.01.02 |
| Remote development in WSL (0) | 2022.01.02 |
| WSL에서 X로 그래픽 애플리케이션 실행 (0) | 2021.12.30 |
X Window 시스템 아키텍처는 X 서버와 X 클라이언트를 별도의 시스템에서 실행할 수 있도록 하며 WSL의 경우 X 서버는 OpenGL 가속을 제공하는 Windows 서버가 되며 클라이언트는 WSL 환경에서 실행되는 그래픽 Linux 응용 프로그램이 됩니다.
아래 Windows용으로 사용 가능한 여러 X 서버 중 하나를 설치하고 실행합니다. 본문서에서는 MobaXTerm을 설치했습니다.
MobaXTerm을 설치 후 실행하면 아래 그림과 같이 좌측에 WSL-Ubuntu session이 보이는데,
더블 클릭하여 화면과 같이 WSL(X 클라이언트)로 접속합니다.

이제 Ubuntu(WSL)에서 실행할 그래픽 응용프로그램을 설치합니다. 본문서에서는 xclock을 설치합니다.
xclock은 DISPLAY 변수가 제대로 설정되었는지 테스트하는 편리한 도구이며, "xclock" 명령을 실행하면 GUI 기반 시계 화면이 나타납니다.
WSL에는 xclock가 설치되어 있지 않으니,
WSL에 접속한 후 apt-get install x11-apps 명령어를 실행하여 Ubuntu용 X Window 응용프로그램인 xclock을 설치합니다.
sudo apt-get install x11-appsWSL에는 xclock가 설치되었으니, xclock 명령어를 실행합니다. 화면에 그래픽 시계가 나타납니다.
xclock
X서버에 연결이 안될 때
그래픽 응용 프로그램이 실행 중인 X 서버에 연결할 수 없는 경우 응용 프로그램(xclock)을 실행하기 전에 터미널에 다음 명령을 붙여넣거나 ~/.bashrc에 추가하여 X 클라이언트 환경을 설정합니다.
export DISPLAY=:0 # in WSL 1
export DISPLAY=$(awk '/nameserver / {print $2; exit}' /etc/resolv.conf 2>/dev/null):0 # in WSL 2
export LIBGL_ALWAYS_INDIRECT=1
이제 WSL에서 그래픽 애플리케이션을 수행할 수 있는 환경을 확인했으니, Linux GUI 프로그램을 수행하여 GUI 프로그램을 사용할 수 있습니다. 본문서에서는 nautilus을 설치합니다.
sudo apt install nautilus
nautilus 명령어로 실행한 화면입니다. 실행하면서 몇 개의 오류 메시지가 뜨는데 아래와 같이 실행은 됩니다.
nautilus
참고 :
XServer(예: 저장된 config.xlaunch를 사용하는 vcxsrv.exe)를 시작하고 Windows DOS 배치 파일에서 XWindows 세션을 시작할 수 있습니다. 이 방법을 사용하면 DOS ipconfig를 사용하여 가상 이더넷 WSL2 IP를 결정하고 세션을 시작하기 전에 DISPLAY 환경 변수를 설정할 수 있습니다. 이것은 가상 이더넷 IP가 Windows를 재부팅할 때마다 변경되기 때문에 유용합니다(따라서 위의 DISPLAY에서 awk를 사용해야 함). 배치 파일의 이름을 지정하고(이 배치 파일 코드 주석 참고) config.xlaunch 파일이 있는 동일한 디렉토리(이 스크립트는 c:\bin\)에서 실행하세요.
@echo off

rem Works ONLY if Ethernet adapter vEthernet (WSL): is the LAST "adapter" in
rem the ipconfig output; that is, this for loop assigns the IPs from first to
rem last from the ipconfig printed output, so the WSL virtual adapter must be the
rem last one in the ipconfig output for this to work correctly.
rem If you have excellent DOS batch file skills, you may find a better
rem way of doing this.

for /f "tokens=1-2 delims=:" %%a in ('ipconfig^|find "IPv4"') do set ip==%%b
set ipAddress=%ip:~1%

rem Trim whitespace

call :TRIM %ipAddress% ipAddress

rem Use this for testing

rem echo IP Address: %ipAddress%

rem Start up the xServer using saved xlaunch configuration
rem This configuration creates a single large window

start /B config_one_window.xlaunch

rem Start up PulseAudio server, will accept audio from external
rem source, i.e., from the X server

start "" /B "C:\bin\pulseaudio-5.0-rev18\pulse\pulseaudio.exe"

rem Call ubuntu.exe, have it run what is essentially a startup
rem script that sets two ENV variables using the ipAddress variable
rem created above, which is the virtual IP to which services
rem INSIDE the running X server can connect; these are the
rem link between WSL2 and Windows 10
rem Initiate an xfce4 session with dbus-launch
rem when the X server is killed, do cleanup by
rem killing pulseadio and vcxsrv

<PATH_TO_UBUNTU_EXE>\ubuntu.exe run "export DISPLAY="%ipAddress%:0.0"; export PULSE_SERVER="%ipAddress%"; if [ -z \"$(pidof xfce4-session)\" ]; then  dbus-launch --exit-with-session ~/.xsession; pkill '(gpg|ssh)-agent'; taskkill.exe /IM pulseaudio.exe /F; taskkill.exe /IM vcxsrv.exe; fi;"

rem Function to trim white space or the export VARIABLE will fail

:TRIM
SET %2=%1
GOTO :EOF
| VS Code 아키텍처 - 수정 (0) | 2022.01.02 |
|---|---|
| Windows WSL2 아키텍처 (0) | 2022.01.02 |
| Remote - WSL (0) | 2022.01.02 |
| Remote development in WSL (0) | 2022.01.02 |
| WSL에 go 설치하기 (0) | 2022.01.02 |